Here is our latest video on our Treasure Box series project.
Thanks for watching
#marquetry #inlay #chevalet # veneer
Wednesday, February 12, 2020
Saturday, December 8, 2018
Antique Refinishers, Inc, The Treasure boxes
A video from the San Diego Woodworking Association, on our Treasure Boxes
Sunday, December 2, 2018
Treasure Box III - Post #5: Chêne de Tronçais - Tronçais' Oa
I have been working more on the Treasure Boxes than on the blog…
I could cut down the blog and fast forward to now, closer to the end, but I understand some of you like the step by step appoach.
One of the reason I have not been updating our progress as much as usual, and I am usually not great at it anyway, is that the first box was ordered 11 months ago, on drawing alone. It was bought by the wife of one of our best client for a big birthday, one with a brand new zero in it. The down side was that we had only 9 months to bring one of the 4 boxes to a presentation stage for the big date.
It is a small series so we worked on the 4 of them as much as possible and focused on the first one in the last couple months to bring it to presentation. We usually take 2 years to complete a series of 4 boxes, with all the other work and the fact that this box is the most comlplicated one we made so far, iit has been quite a challenging and very busy year.
One way we saved on time was with the carcass. On the previous 2 boxes we used european beech, one of the best wood we have access to, here, in San Diego, but we wanted to upgrade for something special and as Patrick was really busy working on a 14 foot dining room table, we contacted our friend Florian Bourgine in France.
He proposed to use Tronçais oak for the carcasse, a great white oak to work with.

Tronçais is a forest in Allier, France, that has had areas protected since the 17th century. A lot of the French oak forest where created by Colbert in 1670 when he bacame minister to Louis the XIVth. He ordered 2,5 million acres to be planted in order to become the first naval country and avoid the prediction of shortage of old growth tall oak for boat building by the year 2000. Talk about long term politics.
Today, in Tronçais, there is still a protected area of about 9000 acres with some trees closing to 500 years old.
Today, in Tronçais, there is still a protected area of about 9000 acres with some trees closing to 500 years old.
Florian Bourgine had easy access to that great wood and I knew his quality as a woodworker, so we asked him to help us, in our need of hurry and quality in equal measure, by cutting and preparing as much as possible of the wood before hand.
Dimensions and type of joinery wanted.

(photos by Florian Bourgine)


Ready to ship.

While in the meantime I was working on the marquetry panels.
-- Patrice lejeune
Treasure Box III - Post #4: Cutting Marquetry
So with a bit of tardiness here is an “account” on cutting the marquetry panels our Treasure Box III
As you know, I now do my marquetry in LA with a reduced but sweet set up.

On a piece by piece project the drawing is paramount to the final quality of your marquetry. No change can be made afterwards so I usually work my drawing until Patrick and Kristen pry me away from it.
Once this first stage is complete. We usualy have a good idea of what wood will be used where but there is always a bit of change and it is fixed at that moment. Each number correspond to a wood. We currently have a palette of more than 50 different woods and colors in sawn veneer.

There is always a possibility of change by re-cutting the pieces if you are not happy with the colors, but it is a waste of wood and time.
The pieces are cut on paper first and placed in an exploded view

I leave enough space around the papers for easy handling

On projects with a lot of pieces I cut one side at a time.
Here is the tray for one of the sides
Here is the tray for one of the sides

Each piece is transfered in a numbered square following the guide.
Then the pieces of paper are glued to the corresponding veneer packet. Each of our pack are 4 layer thick, so we will end up with 4 boxes.
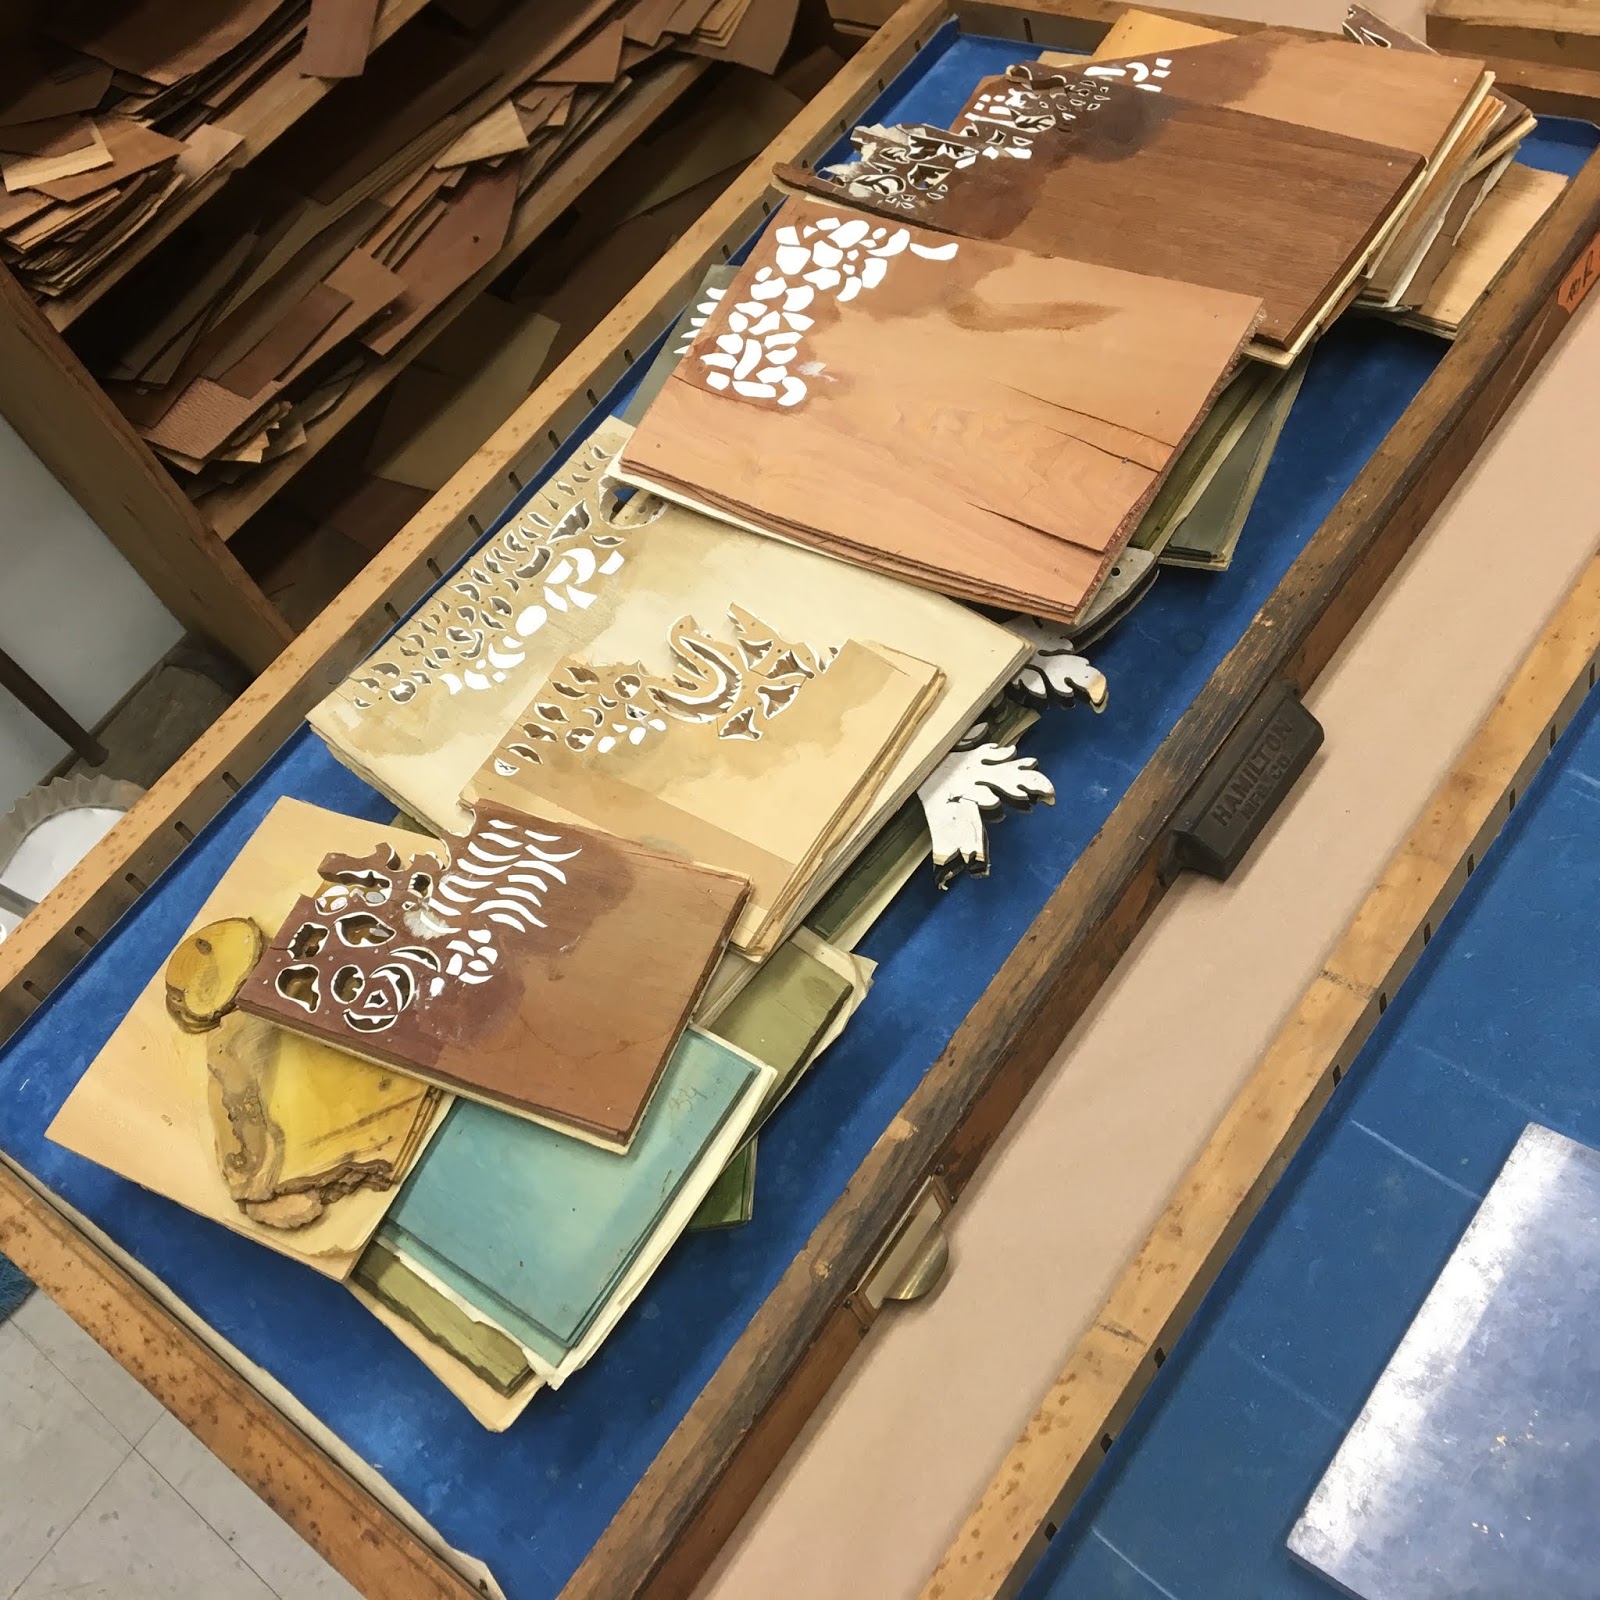
The pieces are cut on the chevalet.

Ans are laid on a tray

Some of them are really small


Some are pretty intricate

Some need a particular attention to accuracy so they nest nicely into each other

The process is repeated for each panel.


The trays fill up

At this point I check the pieces that I marked as possilby not good enough while cutting and decide which needs to be recut.

Once all the pieces are cut and approved, it is time for sand shading.

I have been using gas and actually found it better than electric plate.

On traditional marquetry, I like to give to each piece a bit of shading. It gives volume.

Once all the shading is done it is time to cut the backgrounds, one at a time.

The picture is build face down on paper Using hot hide glue

For those backgrounds, there is a lot of “islands” isolated between pieces. We use bridges to keep them pefectly located.

Those bridges are removed as we go.

Here are, prior to mastic, the 2 sides


The front

And the top

Here we go for the marquetry!
-- Patrice lejeune
Treasure Box III - Post #3: New Marquetry Workshop
One of the reason it has been difficult to keep this blog updated is that my life has slightly changed in the past months.
My wife is now manager of a 19th century french painting gallery in LA.
For years she has been living between LA and San Diego for her research and work, we have to switch and I am now the traveling spouse.
For years she has been living between LA and San Diego for her research and work, we have to switch and I am now the traveling spouse.
For this reason one part of the workshop that I can easily bring with me is the marquetry workshop. I had my chevalet in my first apartment living room in France, it is the case again.
We have been lucky to find a small guest house with a large enough living space so that I can use a corner of it without any problem , and the light is great. I can also do my shading outdoor which is a great option, as per usual, I ended up doing the shading during a heatwave.

So I can now draw in LA, do my prep work in San Diego, assemble packs etc

I have got a nice light to cut and a good coffee machine.

Shade and assemble in LA also

Then the marquetry can be brought glued on paper just kept under clamp to San Diego, where Gigi can take possession of them for quality control.

So overall it works!
Thursday, September 13, 2018
Treasure Box III - Post #2: Inspirati
I have been pretty busy working without much time for updating my blog.
Like many cabinet maker I have a special love affair with a particular piece of furniture. Couple of pieces in fact, but one of them is a coffer attributed to Andre-Charles Boulle at the J.P. Getty museum.

I always wanted to do a copy of it, I still will but we decided that our Treasure Box III was going to be inspired by it.
The original coffer is a “simple” box with a lid, but as we like, in our treasure box series, to add a little bit of details and functionality, we have decided, to add a drop front and a series of drawers and or a till.


Our treasure box is smaller than the original. We could have kept the original marquetry, but aesthetically we believed it was better to create something more in tune to our proportion.
We kept most of the layout and the flow of the scrolls, but made plenty of changes.
First, our lock is in the lid freeing the front marquetry panel for a little more “filling” in the marquetry-wise.
The negative space in the front were probably left to accommodate a key plate and probably 2 decorative side hooks, typical on this boxes. You can still see the holes on the front of the lid were the hook catches would have been.
We also changed the bird to have one looking at us, to involve the viewer in the scenes.
The flow of the branches, the flowers, all have been redesigned to create a all new composition but keeping roughly the original layout.
On all the panels we also put more emphasis on the negative space surrounding the central bird, which is a bit lost in the original front but was very present on the sides and particularly the top.

We also changed the lid front banding with a coin design to tie more with our clover as a key plate.

On the sides, one thing I was not found of in the original was the rubans and decided to live without. So, on top of the change in proportion, removing a big element like that create a change in the flow and layout that you basically have to redesign it.
We also favored having the birds face forward, once again insisting on a negative space around the birds in the center.
We also favored having the birds face forward, once again insisting on a negative space around the birds in the center.


The top got also a little re-treatment, not as much as front and sides but the scrolls have been a bit reworked and flowers I have drawn are placed to match the flowers the closest on the sides and front to tie everything together.
As I do my final drawings as vector lines on the computer, one thing I like to do is to check on my negative space before I go print by filling the background and check the effect. In those type of design I believe that negative space are as important if not more than your actual pieces. You can also see better the effect I was looking for by surrounding the birds with a “wreath” of negative space, installing a central composition into the overall composition. We decided to make it even more flagrant on the top for a even more dramatic effect.
As I do my final drawings as vector lines on the computer, one thing I like to do is to check on my negative space before I go print by filling the background and check the effect. In those type of design I believe that negative space are as important if not more than your actual pieces. You can also see better the effect I was looking for by surrounding the birds with a “wreath” of negative space, installing a central composition into the overall composition. We decided to make it even more flagrant on the top for a even more dramatic effect.

This project is actually well advanced, those who follow our work on Facebook or Instagram know, but I lacked time to write and post more than random pictures. So I will try to catch up and finish this story before the boxes are finished!!!
-- Patrice Lejeune
Wednesday, February 14, 2018
Treasure Box III - Post #1: Remember the Treasure Boxes series?

Remember TB I & TB II ?
Here is TB III

Well. As you can see it is not quite finished yet. But we have been really busy at the shop working on other project that I did not even take the time to post… But here we are, back on track.

Drawing is almost done, the 2 sides are finished and ready to be cut, top and front need to be verified and the back needs a bit more massaging, but it’s there.
We have taken this opportunity to clean up the veneer cellar with the “Tree Hugger”


We also have been cutting more of our own veneer, perfect sizes for piece by piece packets.

This has extended our palette quite a bit.


Our number of sawn veneer woods in marquetry pack is now in the 50’s for TB3. I am not sure we will use all of them in the project but they are packed and ready to go!
Drawing of one of the sides

All the paper cut for that side also


And the packs ready to be cut!

And why not a little extra
More soon!!!
Thanks for following
Subscribe to:
Posts (Atom)