I have been told, do a blog.
I will try.
Try to post as often as I am able to and answer your comments

Tuesday, August 5, 2014

Biedermeier/30s Table #4 - Almost done


Last time I posted on that project I was steam bending my mouldings.

The columned were veneered in a previous post.


Since this post we had another job to do a video on veneering column with Liquid Hide Glue that we posted on our Old Brown Glue playlist on youtube, we are pretty proud of it.

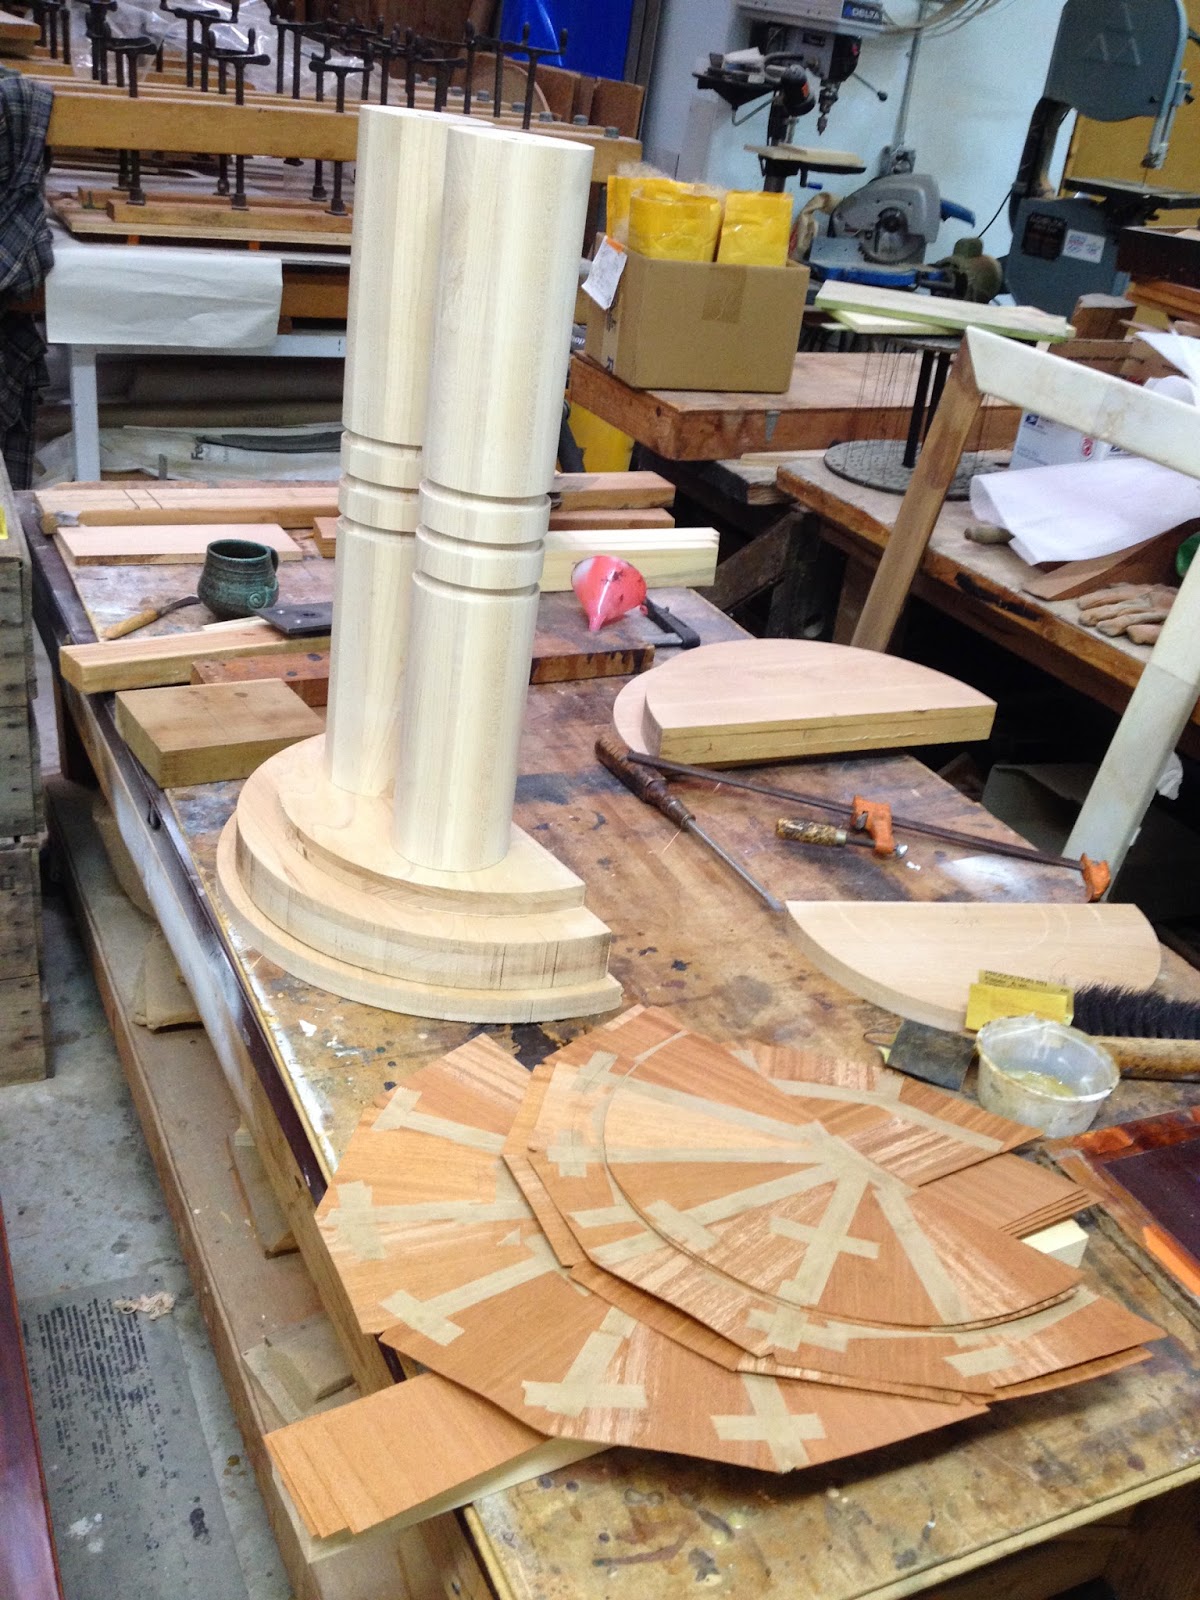
The columns were turned with groves to allow for black rings.

The rings were turned in cherry dyed and broken to be glued in place. I rather break than cut as it will not change the dimensions and also the break will glue back perfectly to its original place.


With that done the base was ready

One last steam bending, I used the apron to steam bend the mouldings for the apron and the top to be sure not to damage my top veneer.

What I love about hide glue and particularly Old Brown Glue, as it is so easier to work with on big glueings, is that I can mess up. Here the moulding was not flush so a bit of water a hot iron and hop! Done.


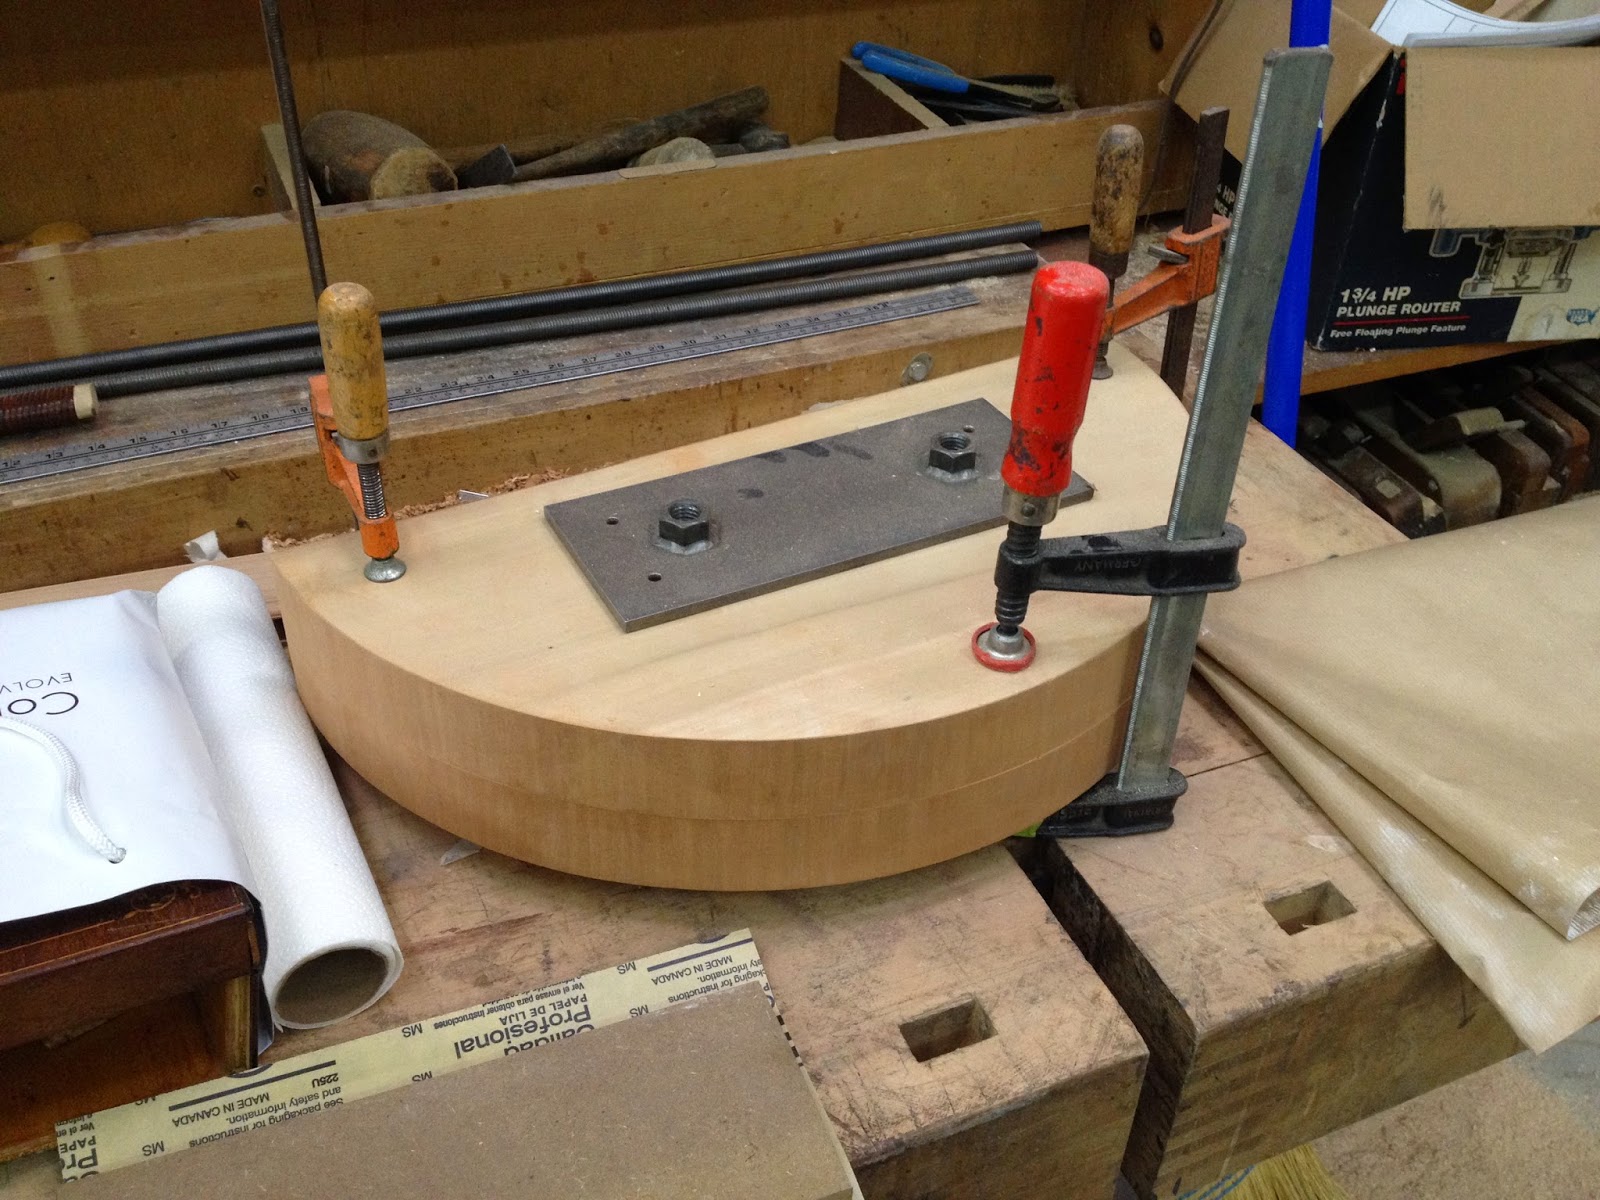
We have bolts going through each columns to connect with the top. We had a plate made by our friend Jesus who makes our chevalet kits for the school.

The plate was inserted in the capital with a wooden piece on top to allow for more glue surface.

Then the capital was glued to the table.

Leaving access to the bolt, hopefully rightly placed.

We found some nice original rails for a round table in our parts room nicely called the graveyard. We can pick up dead bones there and resurrect them in furniture.


The base is bolted on for a test run.

Then surprisingly enough it does not tip off, it is flat and everything open and close like a charm!


So couple touchups and sanding here and there and it is off for finishing, which will be the next and last post on that job!
Cheers
-- Patrice lejeune

Tuesday, July 1, 2014

Parchment Covered Table


It has been a while since i did parchment jobs. If I can give anyone advice it will be stay away from it.
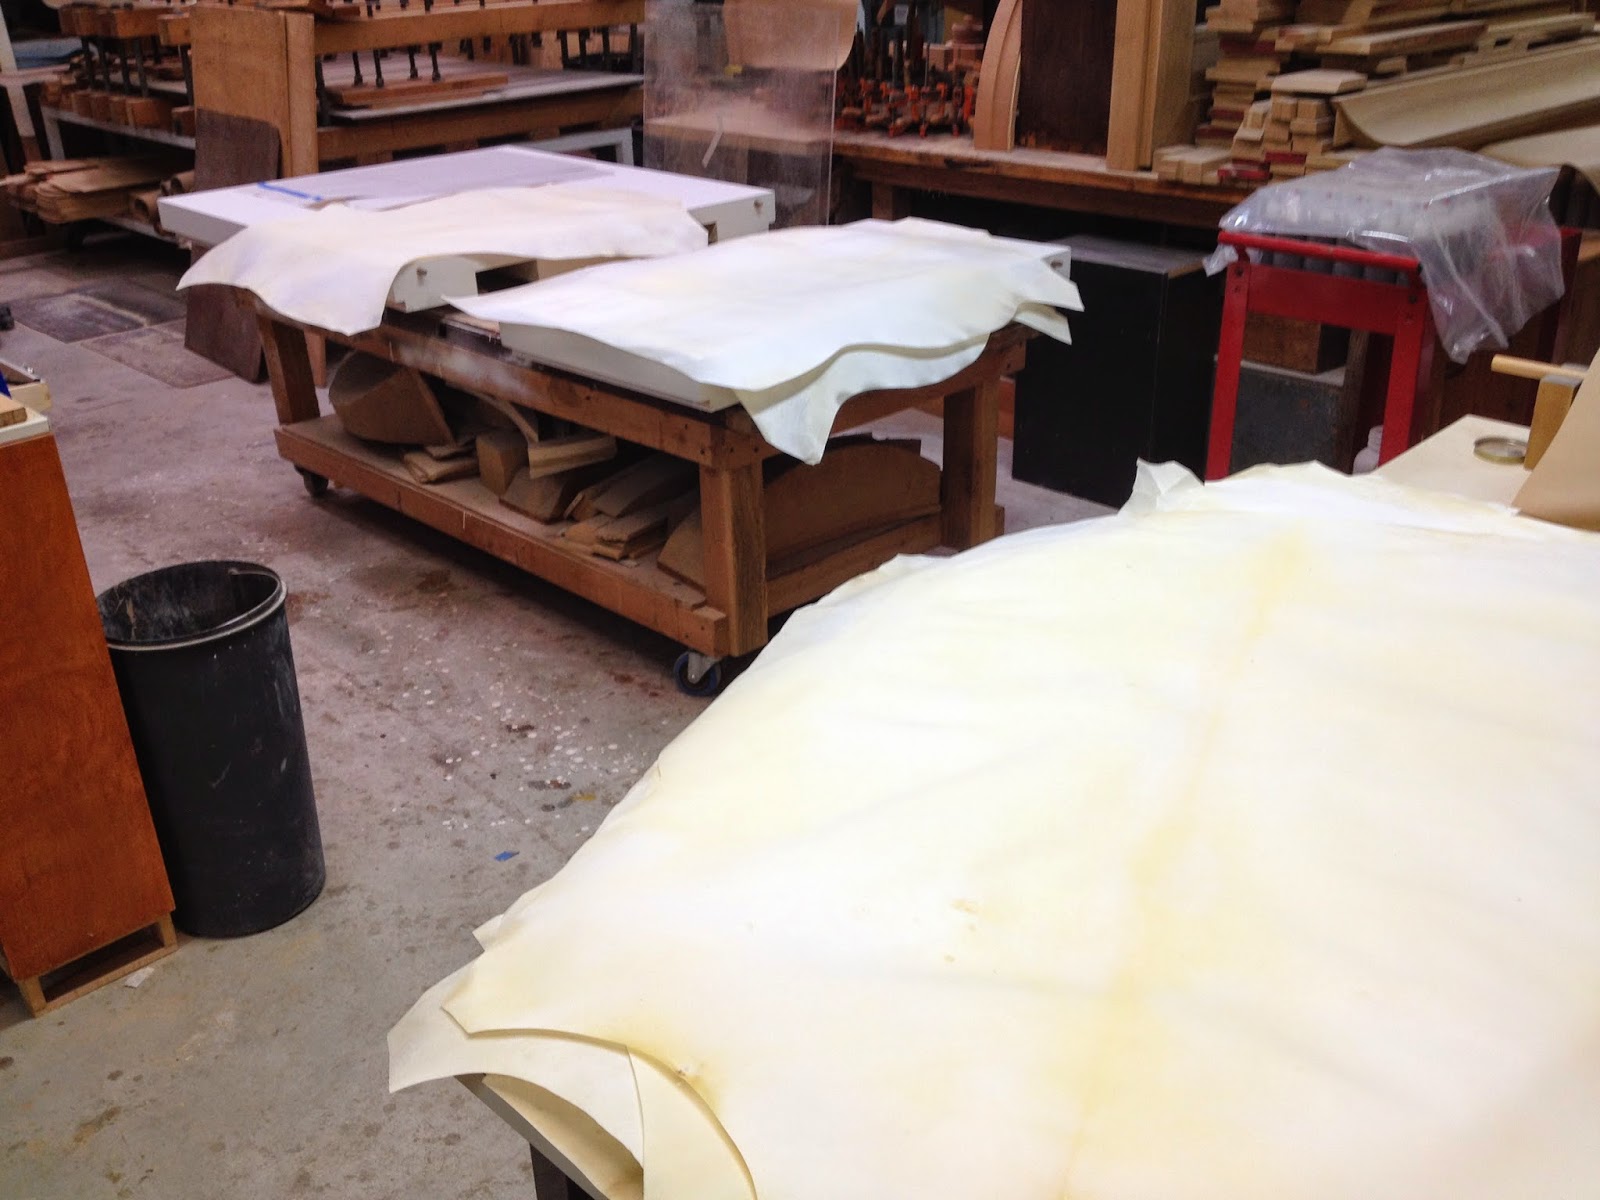
I usually use goat skin parchment which is not as smooth and nice than the sheep, but larger. I needed big skin for that job. Parchment is like an animal, it is still very alive. It does not like moisture pressure and heat. If you press it real hard it will go back to transparency, if you heat it it will go back to transparency or you may burn the top layer of the skin which is protein, and as soon as you apply moisture like glue it stats curling like mad.
I got that job as the top skin of the table had been damage during the redoing of the polyester finish covering the skin. This finish on parchment was very trendy in the 50’s but polyester has a life span not that great, it is plastic after all, and sanding the skin was not an option as the owner discovered. The textured surface is a very thin layer and if you go through by sanding, you loose it and have the meat side appearing and blotchiness, which is not very attractive.
I started by applying gesso to the table top. Gesso is a mix of rabbit skin glue, water and calcium carbonate, a white powder. I like it under the parchment as it has a natural affinity with the liquid hide glue and the skin, they are all protein based.

This is one end of the table and the middle leaf, it weigh as much as a dead horse and seems to be made of lead rather than ply.
I did paper pattern to check where to cut on the skin. The spine of the skin neded to align in the center of the panels and I neded room for the folds. I also included the location of the spine for alignment.

Then I laid out the skins to find which will go where.


Protein glue is the best option for parchment as there is a chemical as well as a mechanical bound. Anyway in my opinion hide glues are always the way to go except maybe for the outside furniture. I chose liquid hide glue as it is way way easier to manage than the hot hide glue, especially with parchment and I chose Old Brown Glue, not only because I think it is the best, and not only because my partner manufactures it and I get it for free, but also because there is no chemical crap in it. I added calcium carbonate to it to turn it ivory color, not really needed as Old Brown Glue does not stain, but I like it that way.

Here is a view of my corner and my set up for the job

I start applying the skin in a corner, let it dry a bit to let time for the skin to retract, then cut the sims, clean the excess glue with water and advance in diagonal. You can see in the back the central leaf with half the folds done. The skin is already glued down but I place weight on it just saw it does not curl away when I am not looking.

The folds are made by wetting the skin, not to much, just enough to make them flexible enough, and I fold them with a bone folder you can see under the clamp on the left, then I press it on to hard just enough to have it stay in place and stop moving. I have also to be careful to not mark the top while clamping, the skin will squish and show any marks. Also i will try to cut a nice 90 degrees angle for the skins but once wet, the skin expend at different rate at different places so there is no such things as a straight line or a perfect angle once the glue is applied and you have to fight with it to make it go where you want it to stay.

Just a cleaning with cold water and we are done.


Working with parchment is a bit like wrestling with the goat it comes from and it lives us exhausted after a week work.

-- Patrice lejeune
- See more at: http://lumberjocks.com/projects/102956#sthash.oRPmpcqd.dpuf

Biedermeier/30's Dining Room Table #3: - Almost done


I had some more time to work on my table before to be really interrupted by the parcment job. You can see the post related to the parchment table there.

Back to our Biedermeier/30's table.

The top as been veneered, with Old Brown Glue, our favorite liquid hide glue, shaped and sanded and I did straighten the edges for a nice clean fit.


I have ben playing with steam bending. Russ Filbeck lent us one of his steamer.

I used a PVC pipe to dip my cherry moulding in dyed black water to soak them through


I steamed the moulding for an hour before to bend them. To avoid breaking I made a system, that will be use anyway for glueing, and shaped, bent the piece of cherry starting from the center out on both sides progressively.


It will be short week as I am taking the 4th of. It has been a busy month, with 2 weeks of teaching, working on this table and the parchment table, and did not had any day off, so this is a welcomed break. Next week I should be done with the table and it will be sent for finishing.
-- Patrice lejeune

Friday, May 23, 2014

Biedermeier / 30's dining room table progress


o Patrick did veneer the column.
He first put the veneer on an kraft paper to hold the fiber ni place, we were not sure this thick veneer will like the bending. The article can be found there http://www.oldbrownglue.com/articles.html
What you see here is were the seem was made, on the overlap, using a veneer saw then using the reversibility of the glue with an iron to finish the glueing.

It cleans easily enough with water

I have been careful enough to mark where the ring inset was to find it easily and cut it with a japanese saw


I have also introduce a router to the workshop to do the rabid on those curve, I did not feel like making them by hand on this modern table. But if it had been a period reproduction I will have done it by hand.


Right now I put this project aside

because I have to prep and re-skin that huge table with parchment, I will make a post of it. But I will finish it soon.

-- Patrice lejeune
- See more at: http://lumberjocks.com/Patricelejeune/blog/41205#sthash.HYyXQgL2.dpuf

Treasure Box #2 - Post #9 - Sand Shading


I has been a while and I thought I could give an update on this project.
We are preparing the class room for june, which means cleaning the space we use between the classes as our marquetry and french polish workshop.
I am finishing shading before to put the project on the side for those reason.
I use the sand shading method and mostly dipping considering the number of pieces.

I usually do one or 2 flowers at a time and dip a series of 2 or 3 pieces, sometime 4 which gives me an average of 8 to 16 pieces at all time in the sand. The burning can go real fast on some wood so I prioritize them by there speeds and try to keep the same type of wood in the sand to get a certain rhythm like put it in 1 2 3 4 flip a other one 1 2 3 4 take of the last one 1 2 3 4, put in a new one if I have time 1 2 3 4 flip the first one 1 2 3 4 take of the second 1 2 3 4 etc…

I place them on my paper in order so I can put them back easily in eclate when I am done shading a group. this gives ime for the sand to get real hot again by putting the lid back on.


When I am done doing a side of the tray I put it on the other side of the skillet for a better access to the pieces to shade


So up to today I have done all the box’s sides


and a good part of the top


And as usual couple close up just because I like them


-- Patrice lejeune