I have been told, do a blog.
I will try.
Try to post as often as I am able to and answer your comments

Monday, July 1, 2013

Empire table


Couple months ago we delivered this Empire dining room table.
Our clients loves empire and asked us to create a dining room table inspired by an italian empire library table.

The top was made from solid mahogany Patrick Edwards bought in 72 or 74, I can’t remember.

The marquetry for the base was cut using the stack cutting (Boulle) technique in mahogany and ebony.
The hard part were to cut the straight lines on the greek key.

The cove marquetry were glued with Ol Brown Glue in a vacuum bag. To have the corner matching I did a do not slide prayer.

The feet for the base were carved by our friend Juan Perez inspired by a bronze we had left over from an other project


The top received a “simple” greek key pattern.

I made a jig with a japanese saw. I school and in my workshop in Paris I used a table saw with a special veneer blade and a jig, but here, at Antique Refinishers with Patrick Edwards, it is all hand tools.

Then all the pieces were organized by size and shape

Then put together on an assembly board


The rest was just glueing, sanding, pore filling

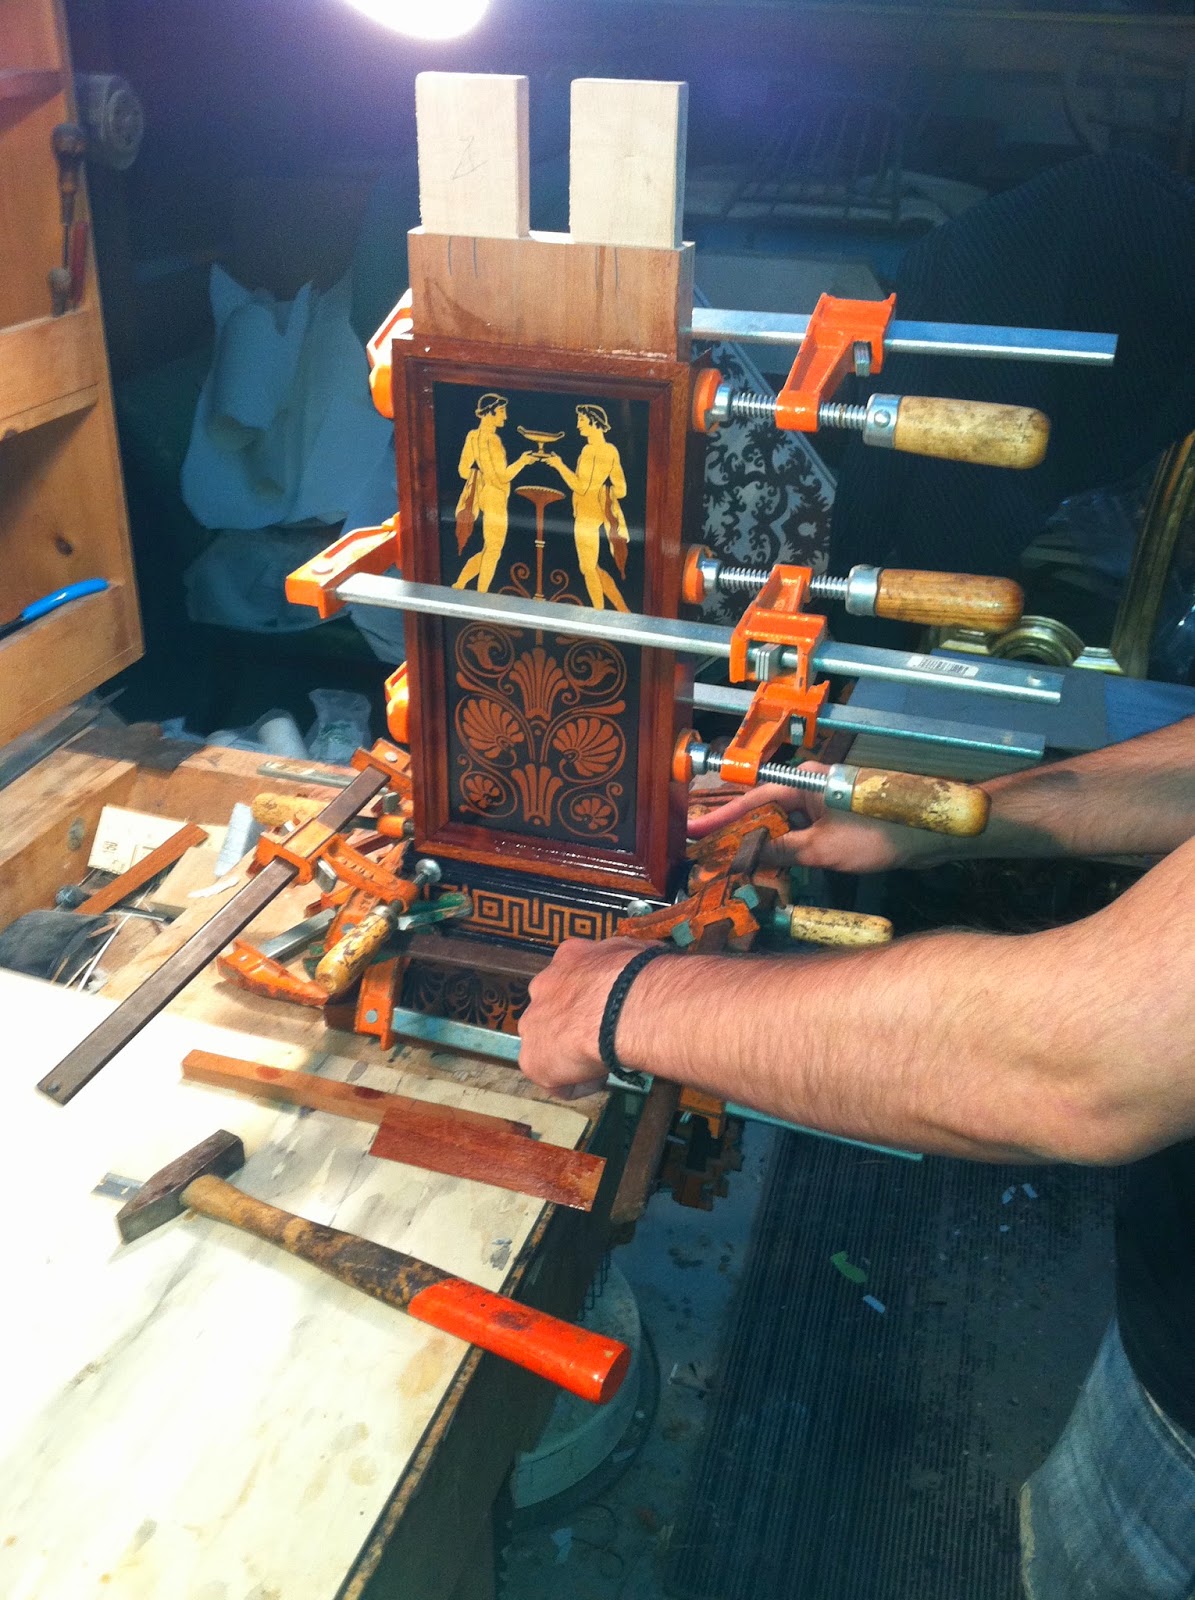

Then french polish


Gilding on a wooden carved frame


A year ago one of our clients sponsored our business Antique Refinishers in San Diego to sent me to learn gilding.
Coming back form Portland, Oregon where I learn with Nancy Thorn I started on a restoration on a frame from our client.
The mirror had been “restored” with gold paint over the giding on 50% of the frame.
After cleaning the paint I saw the frame needed re gilding.


After striping the whiting is applied, it is a mix of rabbit skin glue, water and calcium carbonate.
After several layer the Whiting is water sanded or leveled with a damp rag.
On top of the whiting you apply the bole made of clay, rabbit skin glue and water.
Yellow ocre first, it will hide some of the gold cracking in the recess.


Next step is to put the colored bole if any. In that case it is an italian red.


Next step is actually the gilding. To make gold leaf, the gold has been hammered down until it is so thin you can see light through the leaf. The leaves are extremely fragile on top of being extremely expensive.

The surface is just wet with a brush called a mop, the water reactivate the stickiness of the glue and the clay.

The gold leaf is then applied held by static electricity and a tiny bit of vaseline or sweat on a squirrel gilder brush and is literally sucked down by the water.


Here is a short bad video we made, sorry for the bad quaity.


The best is to get the cat to help you to push the gold in place

The next step is to burnish the area where you want the gold to be really bright and shiny with an agate stone burnisher, in this case the all mirror. Different agate shapes are required .


Then depending on the client, more or less ware on the high points, more or less bings and bangs, and more or less patina. For this client, a lot of ware and heavy patina.

Here are finally the final pictures. it does not do exactly justice to the mirror, there is more of a subtle shine on the gold surface.


Wednesday, June 5, 2013

Liquid Hide Glue - Video series

Yesterday we started a new video series on hide glue, liquid hide glue and Old Brown Glue in particular.

We will try to post a video a week in the question and answer format, so, if you have any questions regarding hide glue and liquid hide glue, let me know.


Friday, May 3, 2013

Summer on the City - Linear movement series marquetry


 In the Abstract Fusion Marquetry series, again recycling the left over veneers, I worked with “stripes to create movement.
With abstract careful attention to the overall composition and to the very details are is required
Some of those details


Pembroke table #2


In 2009 Patrick Edwards and I were commissioned to adapt and recreate a table kept ath the Victoria and Albert Museum.
Our clients liked the top but not the base of the original, staying true to the period designs we created a different base.
On that project Patrick Edwards did the top marquetry using the piece by piece technique. The multiple wood marquetry was inlaid in a bees wing satinwood.


I did the rosettes and dots for the top cut using a mix a stack cutting (boulle) and piece by piece for the inside flower and “cross”, and tarsia certosina, inlay with a punch. Those are made out of rosewood maple and pear. The rosettes were a challenge as the rosewood was prepared first as a small sunburst making the all inside ring cross grain, and I had to cut really straight lines.


I also did the furniture making, joinery with hand tools on beech wood, and the marquetry for the base of the tables. I used piece by piece for the drawers scroll using a dyed tabac maple. The rose bud on the side were cut piece by piece and inserted in a stack cut background. The challenge was to create and regular oval with an even tabac inlay.


 Here are the table finally in their home